|the house diaries| The last room

2017-01-31 11.04.49 1.jpg

This is the only room in our house that has remained completely as it was. But for the new electrical and heat vent, the last room stood as it had for the last family who lived here–the family that was here for nearly 125 years. Nevertheless, the peeling, yellowed layers of wallpaper from decades past clung to the walls of the last room while we tore away at its fellows throughout the rest of the house. The carpet, harried from years of abuse, laid limply while we repaired floors, ripped away vinyl, sanded and sealed hardwood where we found it.

Our house looks like a home, except for that last room. The scary room. The door stays closed. A few remaining boxes of things-relics of the move-gather dust in corners. On a few occasions, Pekoe has decided to use the carpet in the last room as an alternate washroom. I don’t blame her. I can understand the confusion. I put a fly strip in there before the summer, and months later, thick with all number of flying insects, it only added to the…ambience….

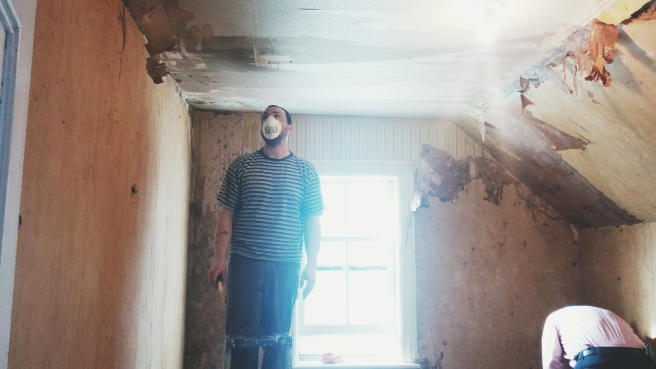
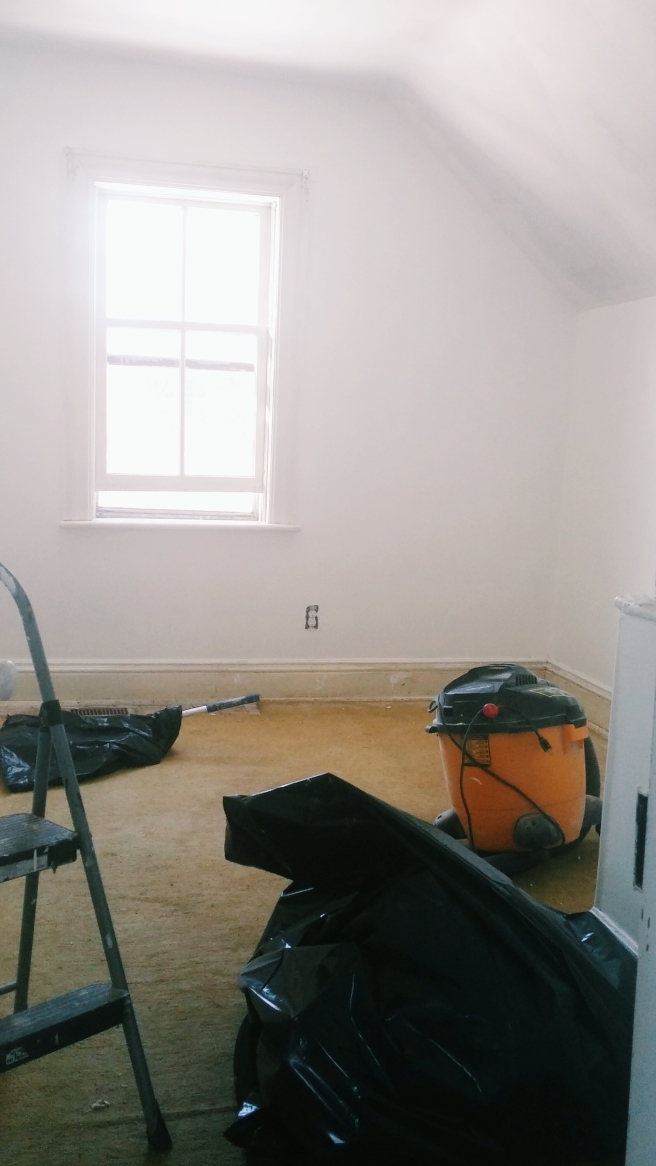
Facebook reminded me that our 2nd house anniversary (housiversary?) crept by a couple weeks ago, and perhaps in a gesture of observance, we peeled away the remaining wallpaper and started to fix the cracked plaster in the last room. This labour-intensive process involves many buckets of plaster, sanding, and stabilizing any of the wall that has fallen away from  its lath.

This past weekend, I was away at yoga teacher training for the whole weekend. When I came home, my partner and his father and primed the walls and applied a first coat of paint. While the trim, floor, lighting fixture and finishing touches are upcoming, it’s already a lot less scary.

2017-01-31 11.02.17 1.jpgIt’s a sunny January day, and from the warmth of my home I can almost picture it being early spring. Now that we’ve done a first pass on everything inside the house, the outbuildings, deck, and gardens are going to take our attention.

And then what? As most homeowners will tell you, you loop back around to those projects that you shelved. A bathroom reno upstairs is in the cards. 90% of our home is missing quarter-round.

Mainly, I can’t wait to get rid of the carpet.

The Reno_Siding installed

siding-before-after

It’s been a while since I showcased a full “Before and After” of a project, and this one has been sitting on my memory card for a while. Don’t be deceived by the after; our home is now a winter wonderland. I thought I’d also talk a bit about materials and costs, since I know some of you are here because you are rocking your own renos.

The project

2015_11_01_siding (1 of 1)

The back addition and attached garage had three issues: 1- The kitchen (which takes up the entirety of the back addition) needed better insulation, 2- The kitchen window hung too low for our new kitchen set-up, and 3- And this is the obvious one..the attached garage is visually disjointed.

Of the two outside walls in the back addition, we had managed to insulate the other one from the inside, by taking down the plaster, insulating it to the teeth, and drywalling it. Since the other side of the house needed to be unified from the addition to the end of the garage, we decided to re-wrap the house from the outside. This also meant that we didn’t simply tear down and throw out what was already there; the original clapboard and sawdust insulation is working hard to give that wall an extra little nudge of insulation.

The materials

sep_2015 (9 of 9)

When we started thinking about materials, we were both on the same page: Since the original house is sided with wood clapboard and we will be maintaining the clapboard around the rest of the house, we sought out wood clapboard the matched what was already there. It may not be the most practical, but it’s true to the original construction and I am a sucker for that kind of thing.

We used foil-sided foam insulation which we attached right to the existing clapboard using those funny nails with the green hats. Ahem.

The cost

Here is roughly what we spent on this project:

  • Wood clapboard – $700
  • New kitchen window – $200
  • Previously loved door with large window – $10
  • Foil-sided foam insulation – $80
  • Paint- $50

All told, that brings us to about $1030.

We saved some money on the paint, which was a mis-tint that nearly exactly matched what we wanted. The door was another great bargain.

I’m convinced that, if we were a bit more crafty when sourcing materials, we could have done the project for about $800. We didn’t bargain-shop for the wood clapboard, since we were in a bit of a hurry to get this done before winter. We could also have saved some money on the new window, but again, we had to move on that quickly to finish off the project.

The next steps

You may have noticed that this wood is as naked as the day it was born. We missed the window to paint it–temperatures weren’t staying consistently warm enough. I’ve also heard that actually having a year of weathering is good for the wood, and that orange/yellow tint should mellow over the winter.

I hope you enjoyed this little full-scope, before/after renovation summary! I hope it will be of interest to other who are planning a “budget”, minimalist, low-waste renovation of their own. Would you be interested in hearing how much a kitchen renovation done in the same spirit cost us…?

Getting ready for winter

I risk sounding like a pilgrim, but here it goes: We are rushing to get ready for winter. The last few weekends, we have insulated things that can easily be insulated, and tried to get our home “gas inspection” ready so that we can finally get that new furnace burning. From removing the old oil tank in the basement, to venting our gas range, there’s a lot of little check-marks that we need to account for before the gas company will give us the thumbs up.

Otherwise, he’s a little play-by-play of what’s new in the world of our century-old little farmhouse.

Project 1: Wrap it up

We’re wrapping the back addition — also known as the kitchen — in rigid foil insulation before re-cladding it. We’ll take the opportunity to make the whole back side look the same. Those garages burn holes into my retinas with their ugliness. Consider this first image a “Before”.

sep_2015 (8 of 9) sep_2015 (9 of 9) sep_2015 (2 of 9)The north-facing wall is getting a double dose of insulation. We’ve already stuffed it and dry-walled it before moving our kitchen in to place. Speaking of which…

Project 2: Finish the kitchen

sep_2015 (3 of 9) sep_2015 (4 of 9) sep_2015 (1 of 1)The kitchen is here! As you can see we’ve already covered most of it with things like empty bottles of wine and wilted celery. (I really considered not posting that last picture but it’s just too good.) I have to photograph the kitchen a little better. I didn’t even take a picture of the island, which is currently housing a lot of tools and renovation materials. But, I’m going to wait until we finish it before showing it off.

Right now, we’re installing a new window that will fit snugly behind our gas range. Since we mainly put in solid blocks of work on weekends, the house can tend to get into regular “messy phases” where all sorts of construction materials are propped against walls, and the dining room table becomes a resting place for sheets of measurements, boxes of screws, and so on.

Project 3: No more American Horror Story staircase

The “before” picture here doesn’t capture the beautiful new walls and fresh coat(s) of paint that have seriously revivified our hallways. I bought floor paint, too, and planned to attack the staircase next. But in a fit of inspiration, we decided that the stairs would look awesome if we made them two-tone; natural wood treads and deep red rises.

The amount of time, effort and mental fortitude that it will take to make this happen is staggering. But it’s worth it if only for the “After” photo.

Before…DCIM999GOPRO

During…

sep_2015 (5 of 9) sep_2015 (6 of 9)

Project 4: Gaze longingly at loving dog

Oh Pekoe… be still my heart.

sep_2015 (1 of 9)C’est tout! I’m really digging the fall in the new house. I have been burning scented candles, and taking Pekoe for tons of walks while enjoying the fall colours. It’s a pretty beautiful time of year in the Ottawa valley.